Quilting Feather Daisies Wall Hanging
Craft this soft-colored wall hanging using the versatile Quilting Feather Daisies embroidery collection. This is an overview tutorial with great machine quilting tips and suggestions. Find the complete instructions here.
Supplies
- OESD's Quilting Feather Daisies #12521
- 1 yd fabric (front center, back and binding)
- 1/4 yd print fabric (borders)
- 2/3 yd or 24" square cotton batting
- Isacord embroidery thread
- 505 Temporary Spray Adhesive or curved safety pins
- Double-sided fabric tape
- Fabric marking pen
Instructions
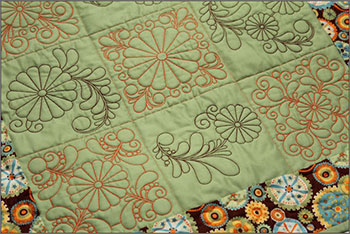
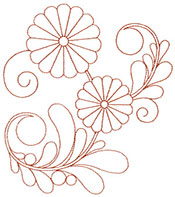
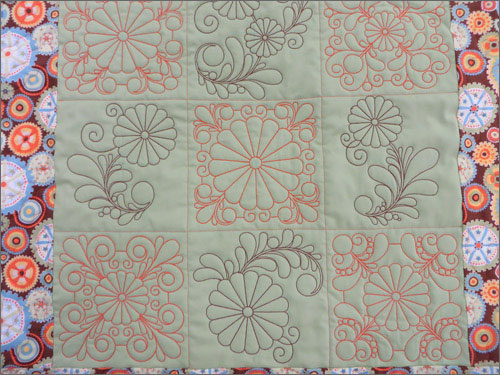
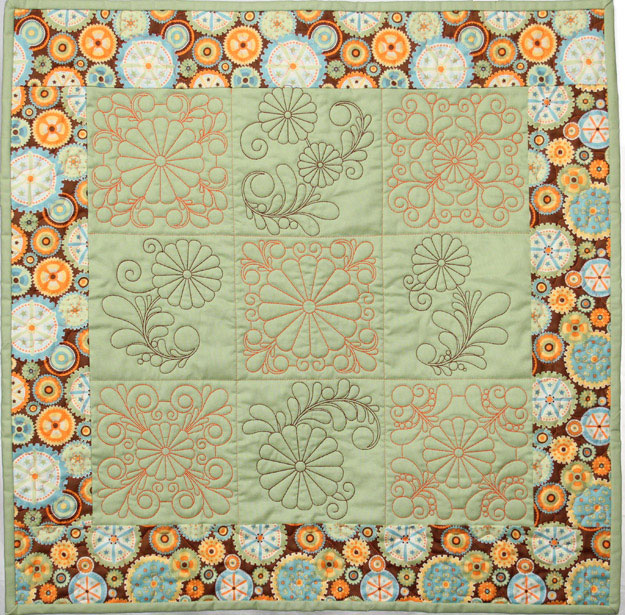
Create a quick small wallhanging showcasing the OESD's Quilting Feather Daisies #12521 embroidery collection. This collection features 9 different outline quilting daisy designs. I used embroidery designs to “quilt” the wallhanging. The complete instructions are included in the OESD Quilting Feather Daisies #12521 embroidery collection.
I will cover using "quilting" designs to quilt any project. How do you decide how to use the designs? How do you get started "quilting" your quilt and what supplies will you need?
Let’s look at deciding how to use quilting designs, like Quilting Feather Daisies. Looking at the 9 different designs in this collection, you will find that all of them would be great to use in a variety of ways. They would be fabulous on table runners and placemats, or even garments. They do not have to be used for “quilting” projects. I think the ones that are more circular in design would look great on a skirt. They could be flowing along the side of a skirt or down the leg of a pair of pants. Or stitched on the back of a shirt or jacket. Use tone-on-tone colors to give it a softer look. The possibilities are endless. Just think of the different ways these designs could be used.
Let’s discuss using the designs for “quilting” your quilt. First, decide if you want to make a large quilt or a smaller one. Will you use some of the designs or all of the designs? Do you want all the squares to include a design? What other way would you “quilt” the quilt? These are some questions you want to ask yourself.
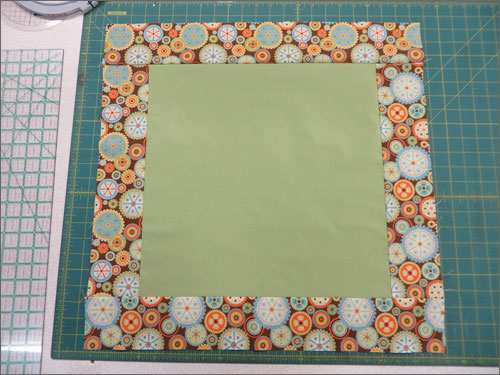
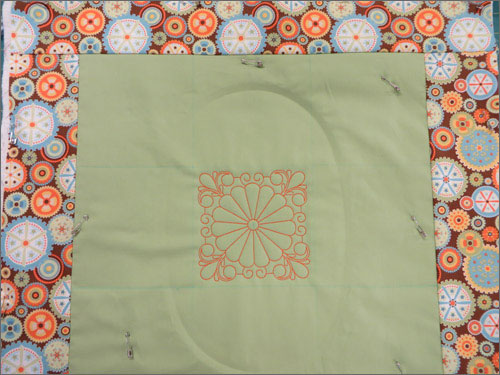
In the project for this embroidery collection, I wanted to use all of the designs. So I used a single piece of fabric for the center and divided it into blocks for the quilting.
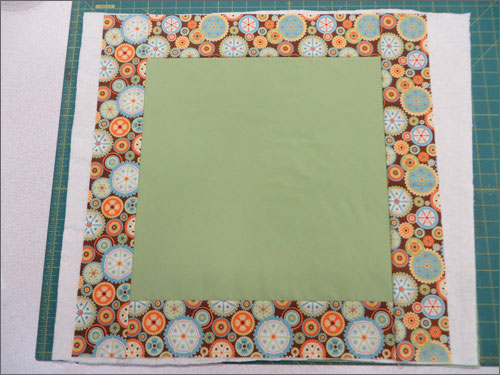
I added a border to the piece of fabric for some additional color. That fabric helped me to pick out the two colors I used for quilting the designs. One was an orange and the other a brown. That way the designs were not all the same color. Once the borders are stitched on then it is ready for layering to be quilted. You now have a quilt top.
To layer a quilt sandwich, place the back wrong side up, cotton batting, and then the quilt top right side up. You can use temporary spray adhesive or safety pins to baste the layers together.
Now you are ready to mark the front center of the quilt top into 9 equal squares. Be sure you use a marking pen that will disappear or erase. After that is done, then you are ready to embroider. Start embroidering the center square, just like you would start quilting in the center. Use a double-sided fabric tape on the wrong side of the inner hoop and the template inside the hoop to accurately place the embroidery design. See the complete instructions for the details which are included in the OESD Quilting Feather Daisies #12521 embroidery collection.
Once all the squares are embroidered, then you can finish quilting the quilt. I used a walking foot to stitch the lines to create the squares. I also added free-motion quilting in the borders.
Finish the quilt by adding the binding. Your quilt is done and ready to hang!
This material is © OESD, LLC and may not be reproduced or published without permission.