Holiday Entertaining
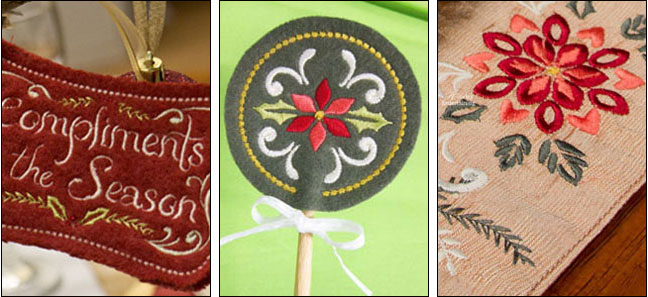
Holiday Entertaining is a versatile collection featuring many designs for your holiday table. This tutorial shows you how to create the coasters, tags, utensil holders, menu holder, and napkin rings.
Supplies
- OESD's Holiday Entertaining #12470
- Isacord embroidery thread
- OESD Heavy Weight TearAway stabilizer
- Temporary spray adhesive
- Scissors
- Felt
- OESD Perfect Punch
- Cookie/lollipop sticks (wood or paper)
- Buttons
Instructions for Coasters and Tags
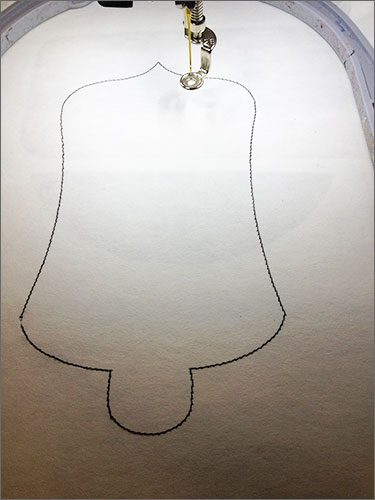
1. Hoop one layer of heavy weight tearaway stabilizer.
2. Attach hoop to your machine and send desired design to your embroidery machine.
3. Stitch only the first color directly onto your stabilizer, this is referred to on the thread chart as “placement stitch.”
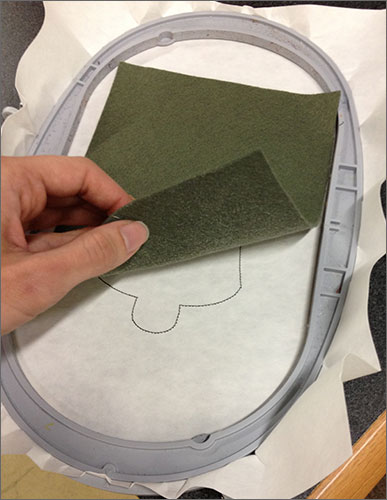
4. Remove the hoop from the machine but do not remove the stabilizer from the hoop.
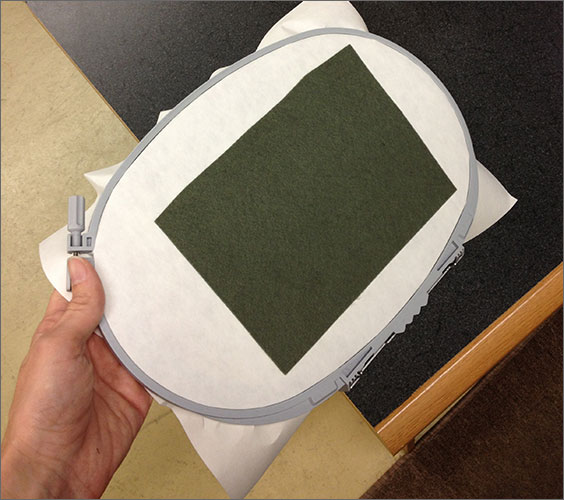
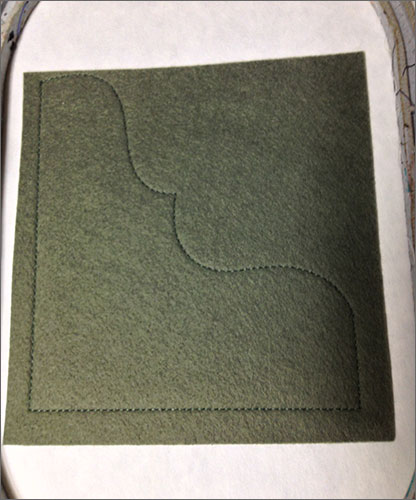
5. Lightly spray the wrong side of one felt rectangle with temporary spray adhesive, and adhere to the hooped stabilizer, making sure to cover the “placement stitch” by at least 1/8” on all sides.
6. Return the hoop to the machine and stitch the next color. This color is called “basting stitch/Cut line.” Sew this in a thread color that contrasts with your fabric, as it will be cut away at the end of the design, and needs to be visible for easier cutting.
7. Continue stitching the design stopping before stitching the final color change, referred to on the thread chart as the “seam and border”.
8. Remove the hoop from the machine but do not remove the stabilizer from the hoop.
9. Carefully turn hoop over to the wrong side.
10. Lightly spray the wrong side of one felt rectangle with temporary spray adhesive.
11. Adhere this rectangle onto the backside of your stabilizer, being sure to completely cover the “placement stitch” by at least 1/8” on all sides.
12. Stitch the final color change; this is called “seam stitch/border”.
HINT: To keep the seam stitch looking nice on the backside of your project, use the same thread in the bobbin
as was used for the top thread for this color change.
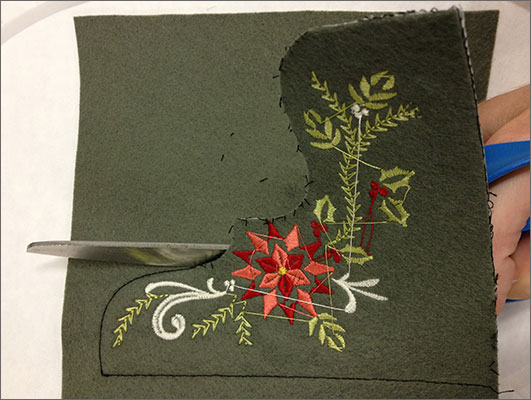
13. Remove the hoop from the machine and the stabilizer from the hoop.
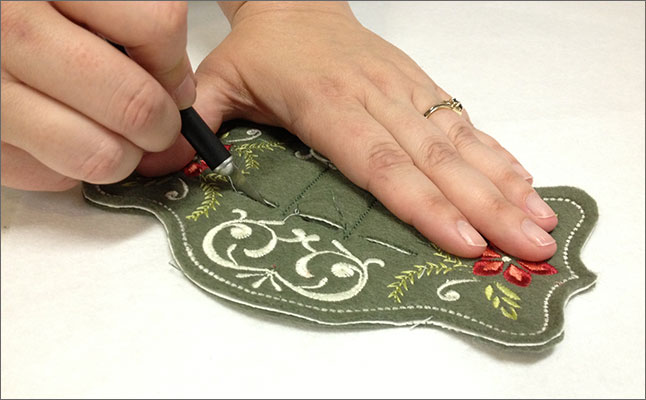
14. Carefully cut the felt along the “basting stitch/cutline.”

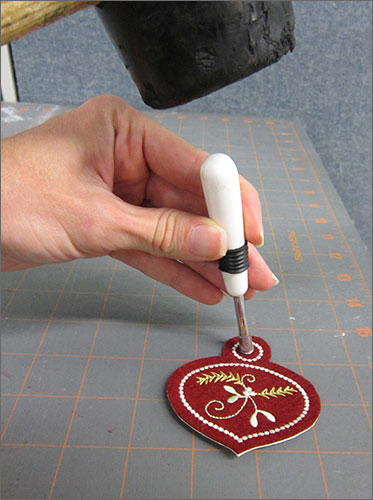
15. For all tag designs (12470-03 to 09 and 12 to 15), use the OESD Perfect Punch or sharp scissors to make a hole to hang the tag by inside the stitched circle.
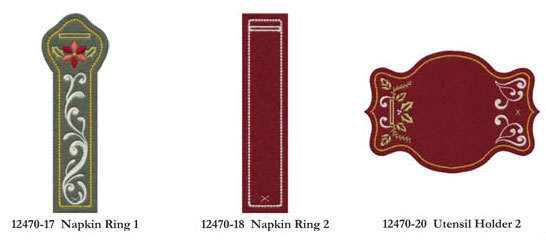
Instructions for Napkins Rings and Utensil Holder 2
Refer to Instructions for Coasters and Tags above - follow steps 1-6.
7. Continue stitching the design stopping before stitching the next-to-last color change, referred to on the thread chart as the “seam and border”.
Refer to Instructions for Coasters and Tags above - follow steps 8-14
15. Use sharp scissors and/or a craft knife to cut a slit for the buttonhole.
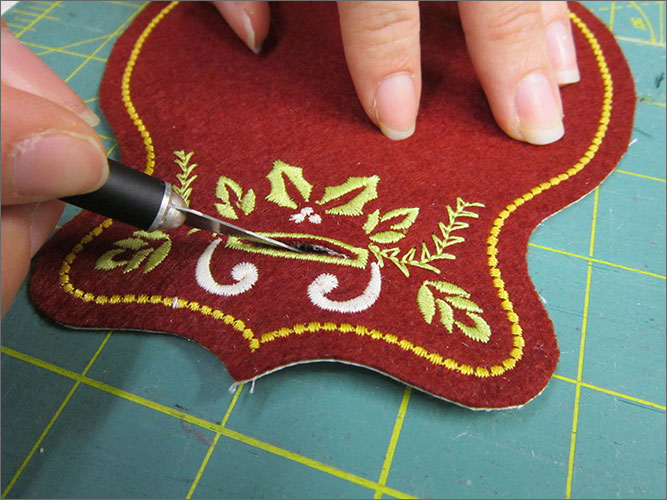
16. Hand stitch a button over the X (This stitch is called “Button placement” on your thread chart).
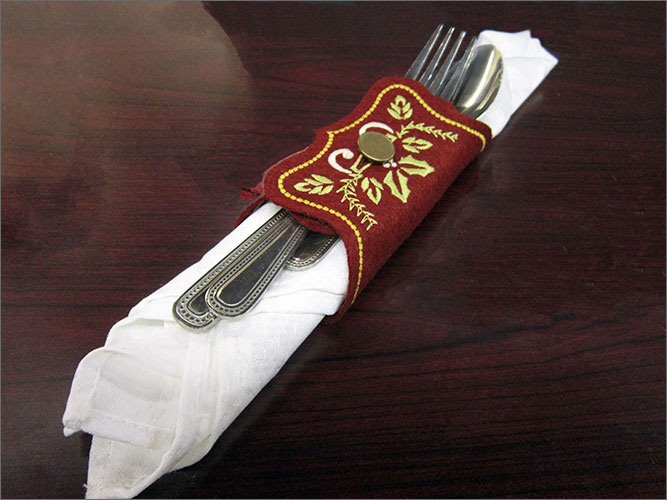
17. Loop your design around a napkin or your favorite set of utensils with the stitching facing out
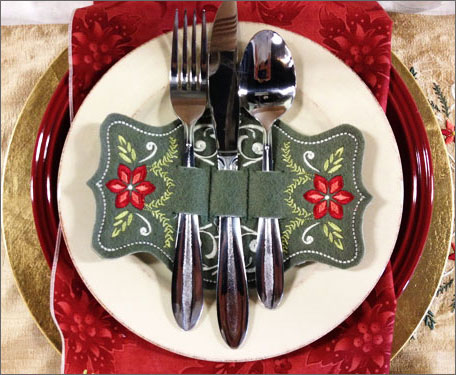
Instructions for Utensil Holder 1
Refer to Instructions for Coasters and Tags above - follow steps 1-14
15. Use sharp scissors or a craft knife to cut slits directly over the stitch referred to as “Utensil Cut Line” on your thread chart. Make sure and cut through both layers of felt and stabilizer.
16. Pull out any extra thread pieces where you cut the “utensil cut line”
17. Slide the utensils for one place setting in the slits.
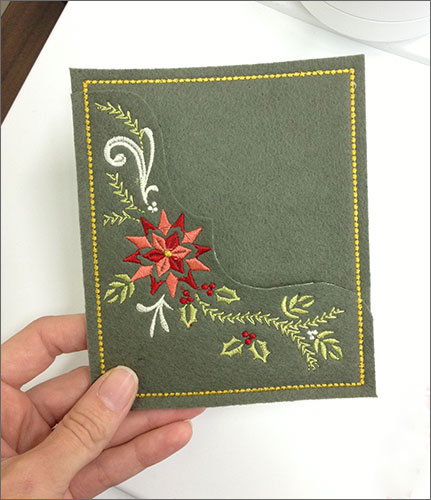
Instructions for Menu Holder
1. Hoop one layer of heavy weight tearaway stabilizer.
2. Attach hoop to your machine and send design 12470-16A to your embroidery machine.
3. Stitch only the first color directly onto your stabilizer, this is referred to on the thread chart as “placement stitch.”

4. Remove the hoop from the machine but do not remove the stabilizer from the hoop.
5. Lightly spray the wrong side of one felt rectangle with temporary spray adhesive, and adhere to the hooped stabilizer, making sure to cover the "placement stitch" by at least 1/8” on all sides.
6. Return the hoop to the machine and stitch the next color. This color is called “basting stitch/cut line.” Sew this in a thread color that contrasts with your fabric, as it will be cut away at the end of the design, and needs to be visible for easier cutting.
7. Finish stitching the design.
8. Remove the hoop from the machine and the stabilizer from the hoop.
9. Carefully cut the felt along the “basting stitch/cutline.”
10. Hoop another layer of heavy weight tearaway stabilizer.
11. Stitch the first color, of design 12470-16B directly onto your stabilizer, this is referred to as "basting/cut line" in your thread chart
12. Very lightly spray the back of design 12470-16A and adhere to design 12470-16B lining up the lower left hand corner to the basting/cut line you just stitched.
13. Stitch the last color change, referred to as “seam stitch/border” in your thread chart
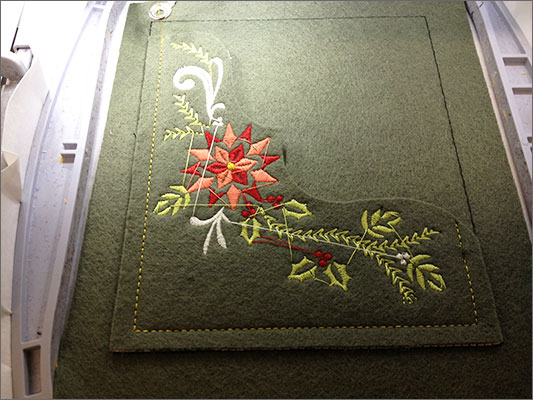
14. Remove the hoop from the machine and the stabilizer from the hoop.
15. Carefully cut the felt along the “basting stitch/cutline”.
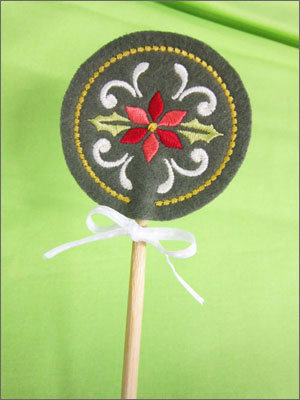
Instructions for Cupcake Sticks
This cupcake stick project uses designs #12470-10 and #12470-11: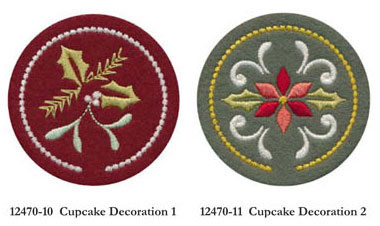
1. Hoop one layer of heavy weight tearaway stabilizer.
2. Attach hoop to your machine and send desired design to your embroidery machine.
3. Stitch only the first color directly onto your stabilizer, this is referred to on the thread chart as “placement stitch.”
4. Remove the hoop from the machine but do not remove the stabilizer from the hoop.
5. Lightly spray the wrong side of one felt rectangle with temporary spray adhesive, and adhere to the hooped stabilizer, making sure to cover the “placement stitch” by” at least 1/8” on all sides.
6. Return the hoop to the machine and stitch the next color. This color is called “basting stitch/Cut line.” Sew this in a thread color that contrasts with your fabric, as it will be cut away at the end of the design, and needs to be visible for easier cutting.
7. Continue stitching the design stopping before stitching the final color change, referred to on the thread chart as the “seam and border”.
8. Remove the hoop from the machine but do not remove the stabilizer from the hoop.
9. Carefully turn hoop over to the wrong side.
10. Lightly spray the wrong side of one felt rectangle with temporary spray adhesive.
11. Adhere this rectangle onto the backside of your stabilizer, being sure to completely cover the “placement stitch” by at least 1/8” on all sides.
12. Stitch the final color change; this is called “seam stitch/border”. HINT: To keep the seam stitch looking nice on the backside of your project, use the same thread in the bobbin as was used for the top thread for this color change.
13. Remove the hoop from the machine and the stabilizer from the hoop.
14. Carefully cut the felt along the “basting stitch/cutline.”
15. Insert a cookie/lollipop stick (wood or paper) in the hole left in the seam/border stitch. Stick in the top of a cupcake and enjoy!
This material is © OESD, LLC and may not be reproduced or published without permission.