Embroidering on Ribbon
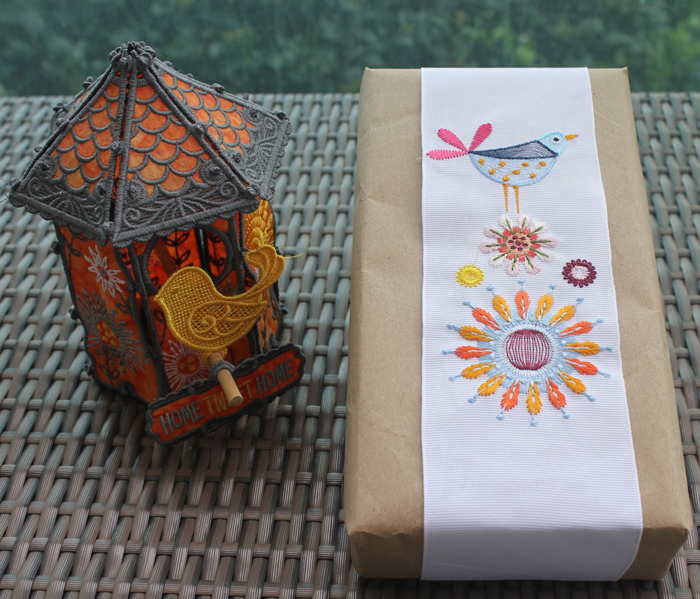
Add a touch of magical whimsy with these colorful embroidered ribbons. Creating these beautiful designer ribbons is a breeze, and they are sure to add decorative flair to any package or parcel. Using OESD’s HydroStick stabilizer allows for perfect embroidery placement with no ribbon slipping or sliding.
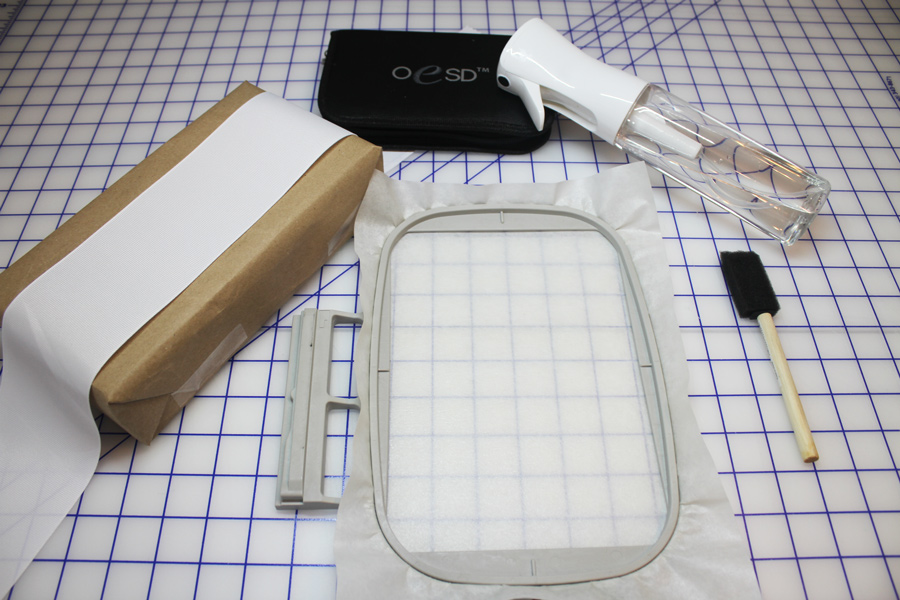
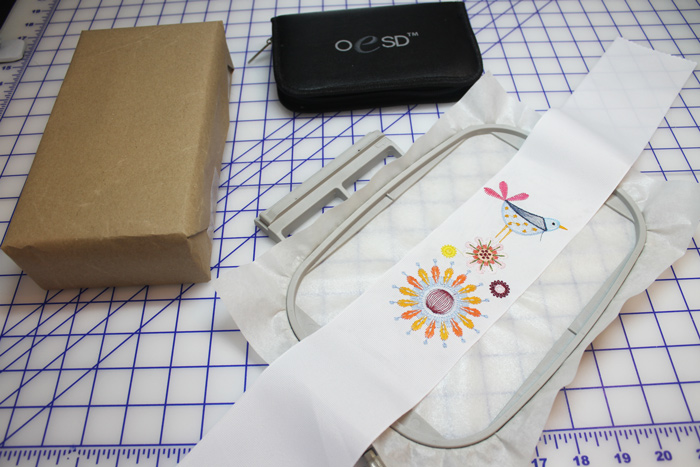
Supplies
- Summer Sampler by Nancy Nicholson #90010
- Isacord Thread
- Ribbon
- HydroStick TearAway
- Spray bottle filled with water
- Foam paint brush
- OESD Perfect Embroidery Press Cloth
Gather all the materials for the project.
Determine the length of the ribbon desired. Fold in half, matching ends together, right side together (RST) to find the center of the ribbon.
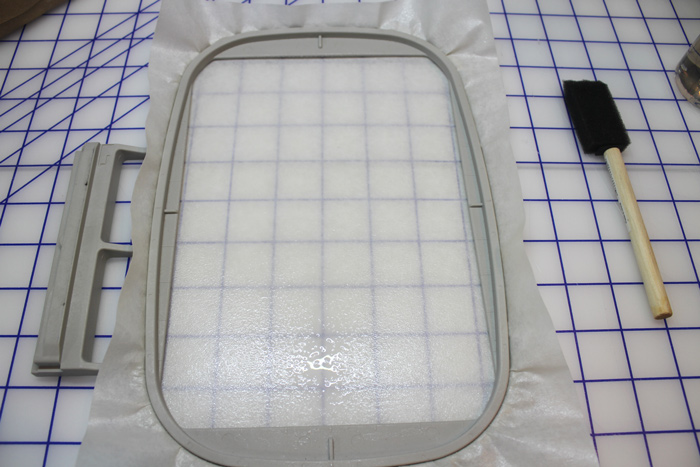
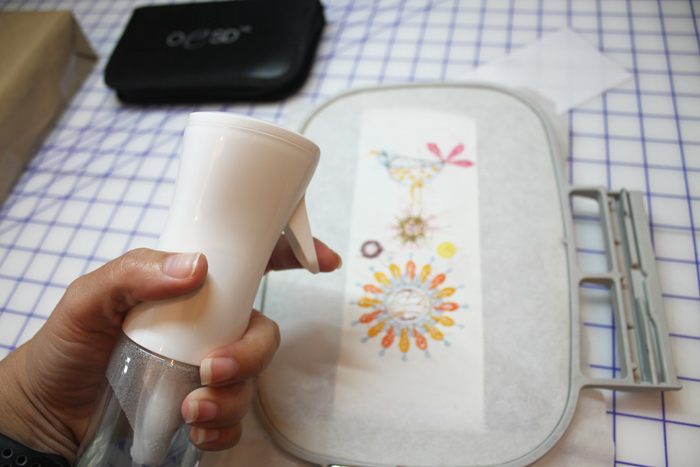
Hoop HydroStick with the adhesive side up in the appropriate hoop for your embroidery design and ribbon. Spray the HydroStick stabilizer with water and “paint” it around with a foam paint brush.
Place the folded ribbon in the center of the hoop and open it up.
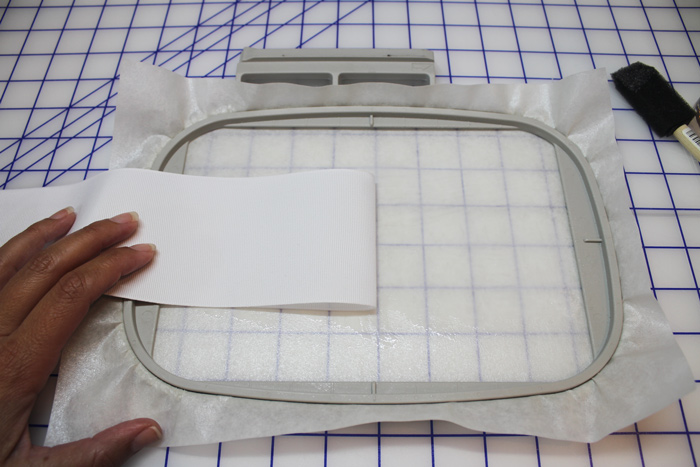
Press the full ribbon onto the HydroStick stabilizer. Let dry.
Place the hoop on the machine. Select and position the embroidery design. Stitch embroidery design per the thread chart.
When the design is finished, remove the hoop from the machine and spray the HydroStick stabilizer with water to de-activate the adhesive.
As you pull the ribbon away from the stabilizer, continue to spray with water.
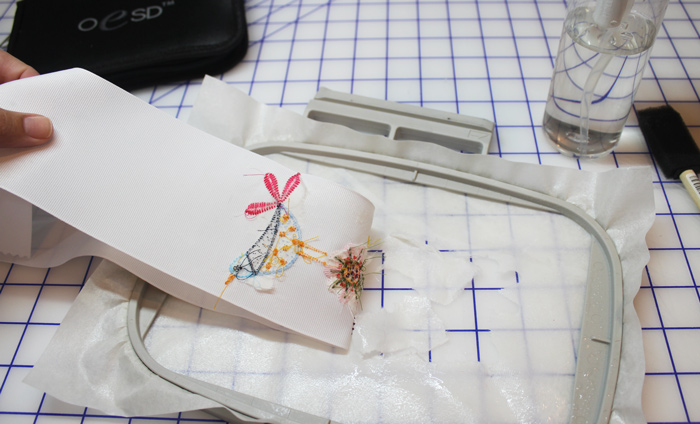
Let dry.
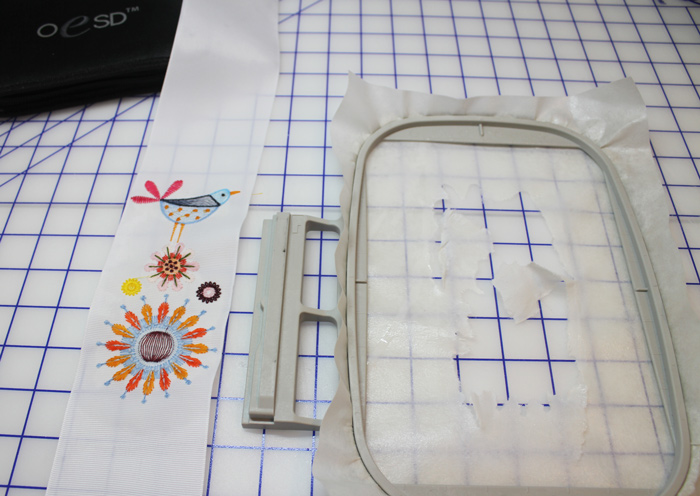
Place the ribbon embroidery side down on a Perfect Embroidery Press Cloth and press. Use the embroidered ribbon for your project!

This material is © OESD, LLC and may not be reproduced or published without permission.