All About Minkee®
 Minkee® fabrics are polyester microfiber plush knits. The names Minky, Minkee and Minkie are commonly used for this type of fabric. The name Minkee is the actual name given by Benartex Fabrics. You will see the fabric called Minkee & Me®, Minkee Zoo®, and Minkee Blankee® as well. There are many different textures of Minkee fabric, including dots, raised stripes, and more. These fabrics are available in solid colors, stripes and a variety of animal prints. They are so very soft and lush that you just want to snuggle up with them. There are many types of projects you can use with the Minkee fabric, such as quilts, blankets, scarves, jackets, robes, and stitch ‘n’ turn embroidery projects, such as Minkee Tag Toys #12495.
Since the Minkee fabric is polyester and knit, there is no need to worry about preshrinking the fabric, or it raveling before working with it. Also, the fabric does stretch more crosswise than lengthwise. If using a pattern, be sure and follow the guide sheet for laying out the pieces. Because of the nap, lay out the pattern pieces in one direction. Remember that the greatest amount of stretch goes around the project.
When using this fabric for embroidery projects, cut small pieces of the fabric depending on the design. Cut the fabric with a rotary cutter or a pair of scissors. Be aware that because Minkee has soft pile fibers, those fibers tend to go everywhere after it is cut. Keep a lint roller handy, as it will undoubtedly be all over you!
 Minkee fabric is slippery, so when sewing, the best option is to use a walking foot. Also, lengthen the seam stitch to about 3.0. Or a small zigzag stitch works too. Finger pressing this fabric is best. Only use a warm iron if necessary. For the needle, an 80/12 universal needle is a good choice. If you have problems, try using a ballpoint needle. Use polyester embroidery thread.
When using the Minkee fabric for embroidery, because it has a nap, a wash away stabilizer is best as a topper. The wash away stabilizer will prevent the stitches from sinking into the fibers of the fabric, making them more visible when the project is finished. Remove the majority of the stabilizer by tearing it away, and remove the rest with water or steam it away. Also, a mesh cutaway stabilizer is the best for behind the fabric.
When using the Minkee fabric for the stitch 'n turn projects, the fabric doesn’t ravel, so when cutting the slit in the back to turn the project right side out there will be no fraying. Simply place the cut edges side by side and slipstitch closed. It’s that simple!
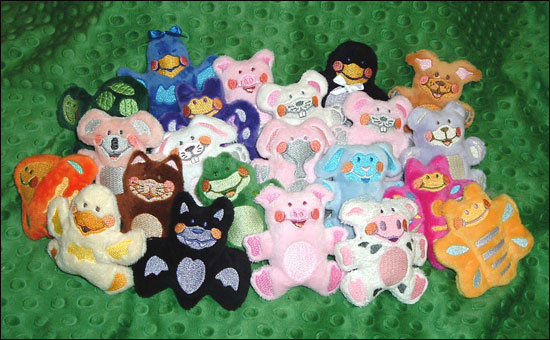
There are several stitch 'n turn embroidery design collections and applique embroidery design collections using the Minkee fabric. One of the very first stitch 'n turn embroidery collections that OESD designed that uses the Minkee fabric is the Minkee Pals #11936. It features 20 small animals, including a kitty, doggy, piggy, teddy, ducky, bunny, and more. It is a fun, quick and easy project. The complete instructions for how to make the little pals are included in the embroidery design collection.
Minkee Mayhem #12299 features a few scenic appliques and several stitch 'n turn animals. Embroider the jumbo owl and bear for little ones to rest their heads on. Create a wall hanging or quilt using the designs and appliques.
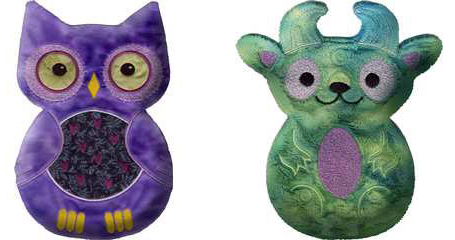
Minkee Monsters #12399 is another embroidery collection of both stitch n turn and applique monsters. Stitch out a gaggle of monsters for endless playtime fun.

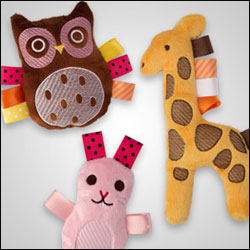
Minkee Tag Toys #12495 features 20 adorable stitch 'n turn toys with bright colored ribbons as the tags. One option is to insert a small squeaker inside the toy, making it a great sensory toy for infants and toddlers.
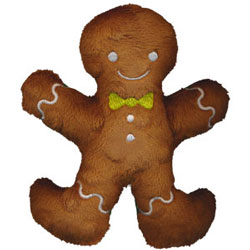
The Stitch 'N' Turn Gingerbread Man from Baby’s 1st Christmas #12537 is another embroidery design made from Minkee dots fabric. It is great for that new little one for the Christmas season.
Minkee Tips:
- No need to preshrink the fabric
- Lay pieces out in one direction due to the nap
- Use a walking foot on your machine
- Set the seam stitch length to 3.0
- Use an 80/12 universal needle
- Use polyester embroidery thread
- Don’t iron unless necessary
- Use wash away stabilizer for the top
- Use mesh cutaway stabilizer for the back
This material is © OESD, LLC and may not be reproduced or published without permission.